| 1. | Log in at www.cornerstonecopy.com |
| | In the top menu, click Login to enter your username and password, or click Create Account if you do not have an account. |
| |
|
| 2. | View template designs |
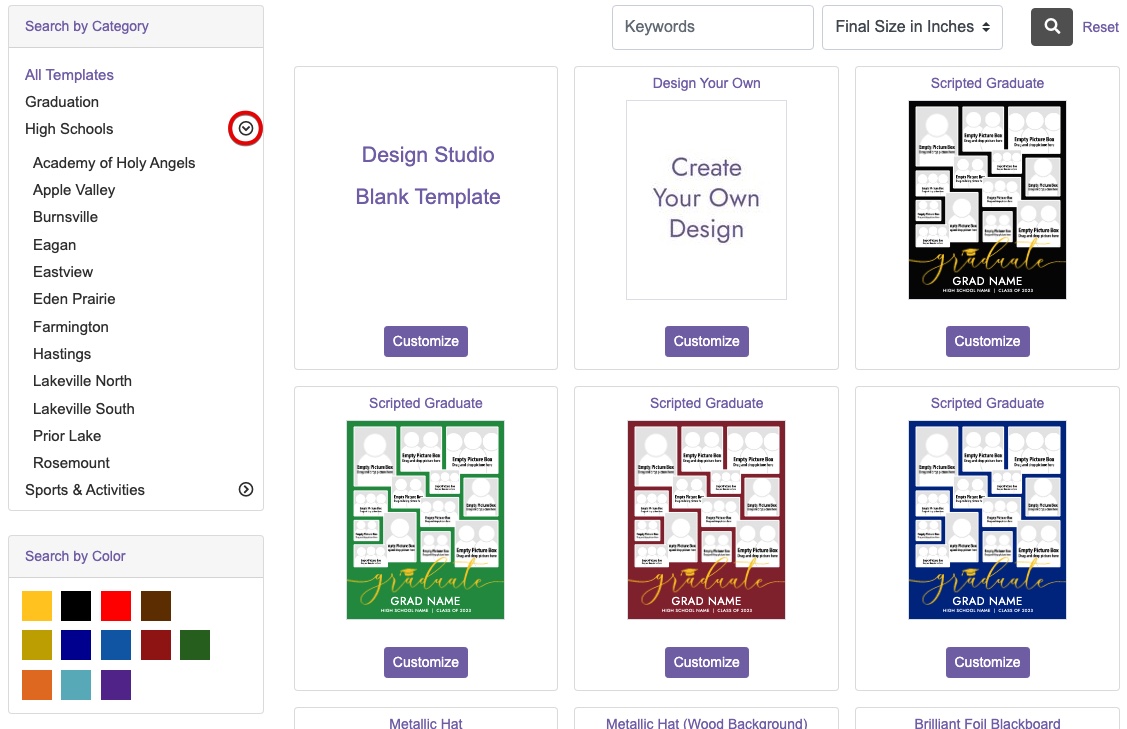
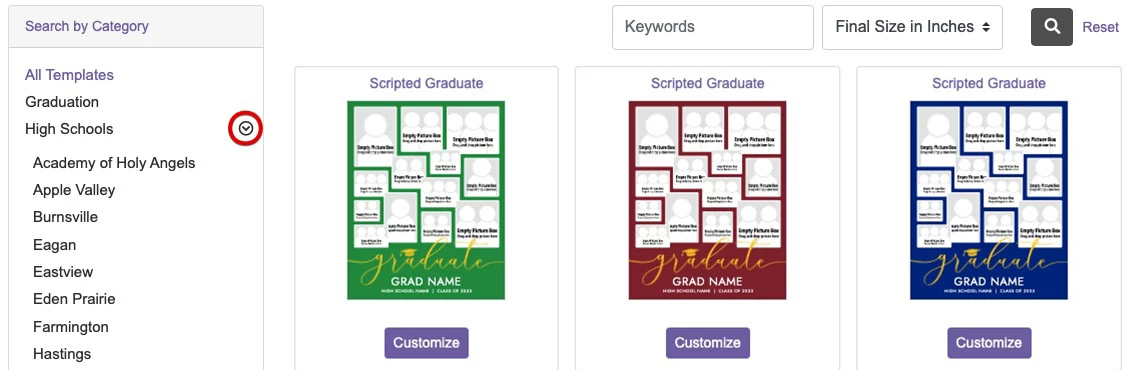
| | Click here to show a list of available Graduation Poster template designs. (Or, use the top menu to navigate to Design Templates > School & Graduation > Graduation Posters.)
|
| | | TIP: On the left side of the page, the template designs can be filtered by High School, Sports & Activities and Color. Click the arrow icon next to a category name to expand the menu. |
|
| | |
| |  |
| |
|
| 3. | Select a design |
| | | Click Customize to begin editing. | |
|
| |
|
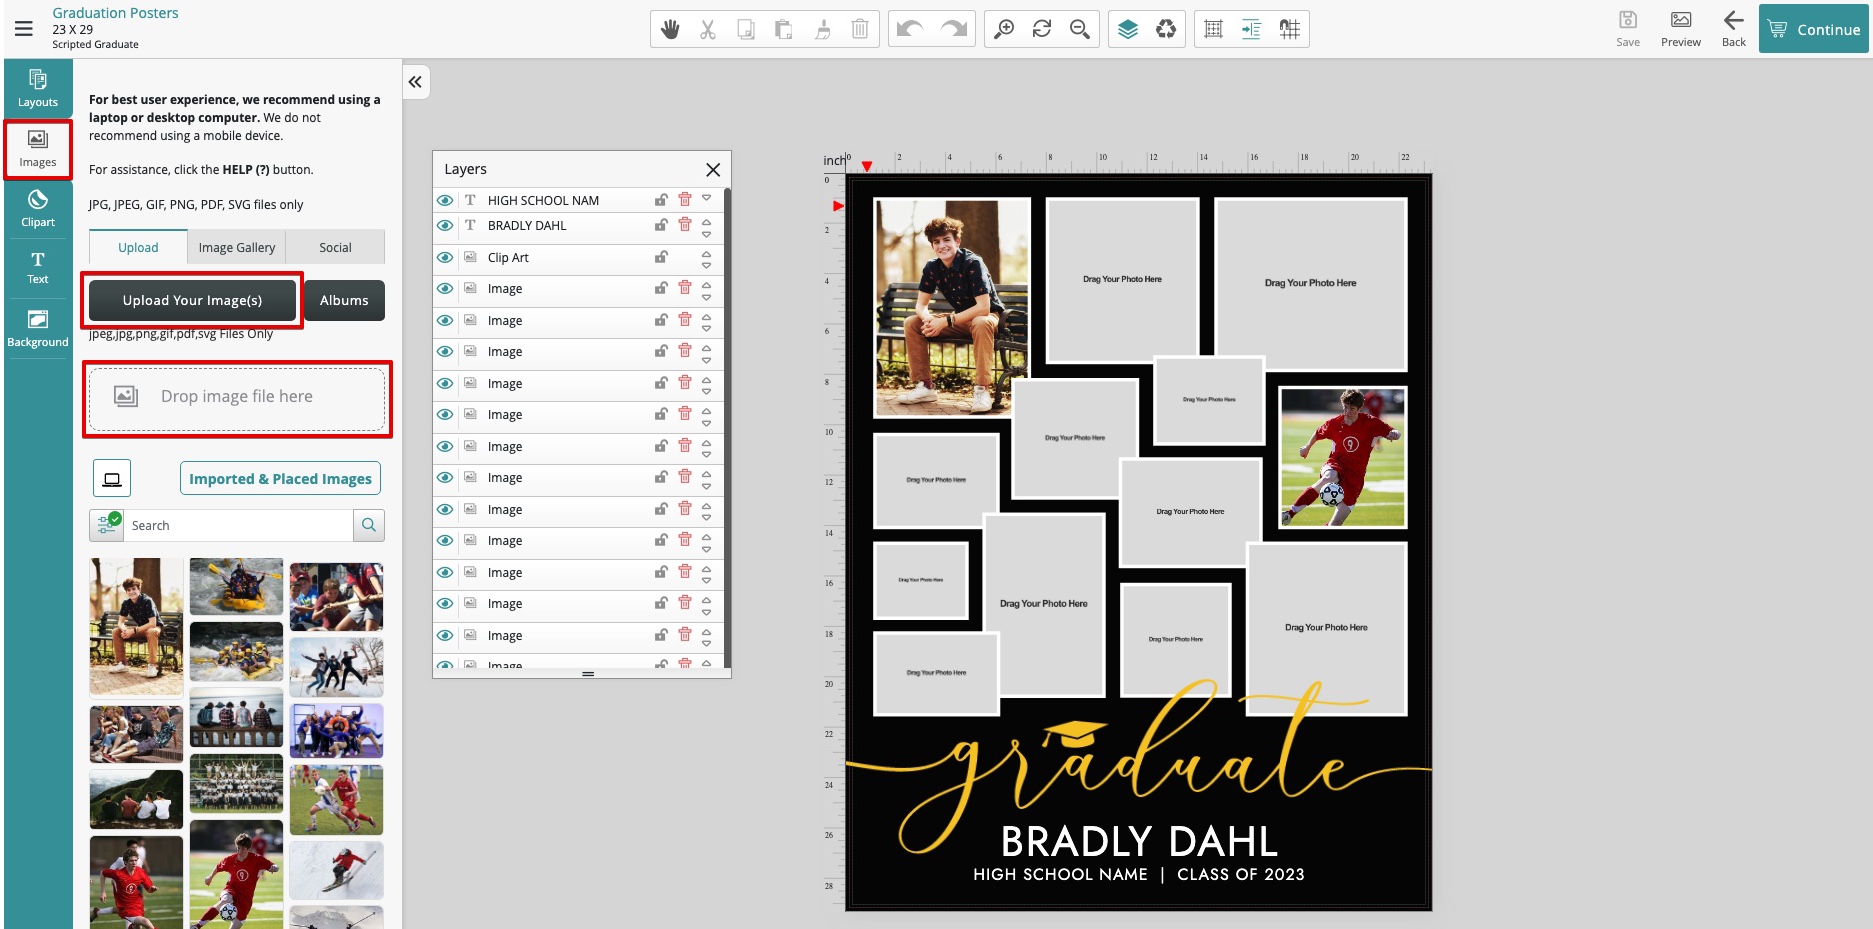
| 4. | Upload your pictures |
| | On the left side next to your page design, click on the Images tab. In the Upload tab you can either: - Drag and drop your images into the upload box Drop image file here.
- Click the Upload Your Image(s) button to navigate files and folders on your computer and select images.
File types that are supported are JPEG, JPG, PNG, GIF, PDF and SVG files. | 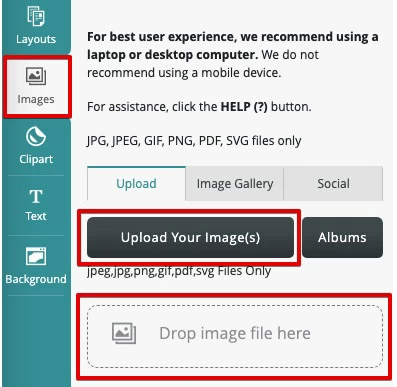 |
Pictures on your mobile device? |
| | You can add your pictures from your mobile device so they are available to all your projects in your account. To upload pictures from your mobile device to your account: - Open a web browser on your mobile device (ie Chrome, Safari).
- Navigate to the Cornerstone website at www.cornerstonecopy.com.
- On the Cornerstone home page, tap the menu icon in the upper left corner to display menu.
- From menu, select Login and log into your account.
- Use the same menu to select Account > My Photos.
- Click the Add Photos button to navigate your device and add photos to your online account.
- When photos have been uploaded, switch to your desktop or laptop computer to finish creating your poster.
When creating your poster, the images can be found in the Images > Upload (tab) and also in the Image Gallery tab. You may need to use the filter next to the search bar to select My Images. |
|
| | |
| |
|
| 5. | Add pictures to your page |
| | When the pictures have completely uploaded, they will appear as thumbnails in the Images tab. Drag-and-drop each of the uploaded pictures into empty picture boxes on your page. |
| | | TIP A: Clicking on a picture thumbnail on the left side will add the picture to your page, however this action will not put the picture into any of the empty template boxes, nor will the picture be styled with any borders that might appear on the rest of the boxes on your page via the template. Therefore, for best results, use your mouse to drag-and-drop the picture into the template box. |
|
| | |
| | | TIP B: To replace a picture that has already been added to a picture box, simply drag a different picture onto the same box. This will replace the current picture in the box with the new picture. |
|
| |
|
| 6. | Take note of picture quality |
| | Click on each of the images on your page to display a quality meter located above your page. The quality meter will display Low, Medium or High. We do not recommend using Low resolution images since they tend to print pixelated, soft and out of focus. Low resolution picture quality varies greatly, and are usually unsatisfactory to customers when printed on a large poster. Therefore, we strongly suggest replacing any Low resolution images with a higher resolution or original version. | 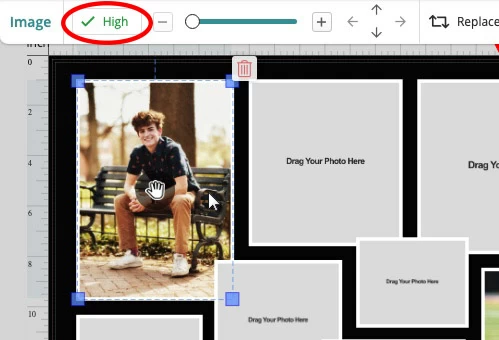 |
|
| | | TIP: It is common for images to become degraded in quality as a result of being downloaded from the internet and shared between friends and/or devices. Click here for more information about resolution, image quality and best practices when sharing/downloading images. |
|
| |
|
| 7. | Adjust picture cropping |
| To have access to additional editing tools, click on a picture that has been added to your page. This will reveal the Image toolbar above your page.  |  | | Zoom in / Zoom Out | Nudge Arrows | Hand Tool |
Use the Zoom In/Zoom Out Slider or click the (+) and (-) buttons to crop out excess image around the edges. Click the Nudge Arrows to nudge the cropped area up, down, left or right in small increments. Click, hold and drag the Hand Tool icon that shows on top of a picture to reposition the crop area of your picture within the the picture box. For a more precise crop tool: - On the Image toolbar click :More.
- Another bar with additional image tools will appear below the toolbar.
- Click the Crop icon to open a new window which will allow you to precisely crop your picture.

When using the Crop Tool, drag the corners of the marquee to designate new cropping. Then click Save. If you would like the picture box to remain the same size and proportions, keep the box checked next to Maintain Photo Proportions. You can uncheck the Maintain Photo Proportions box if you would like more freedom with cropping. Note: The box size will be reshaped to match the new cropping selected. This may or may not be desired, depending on your design. | 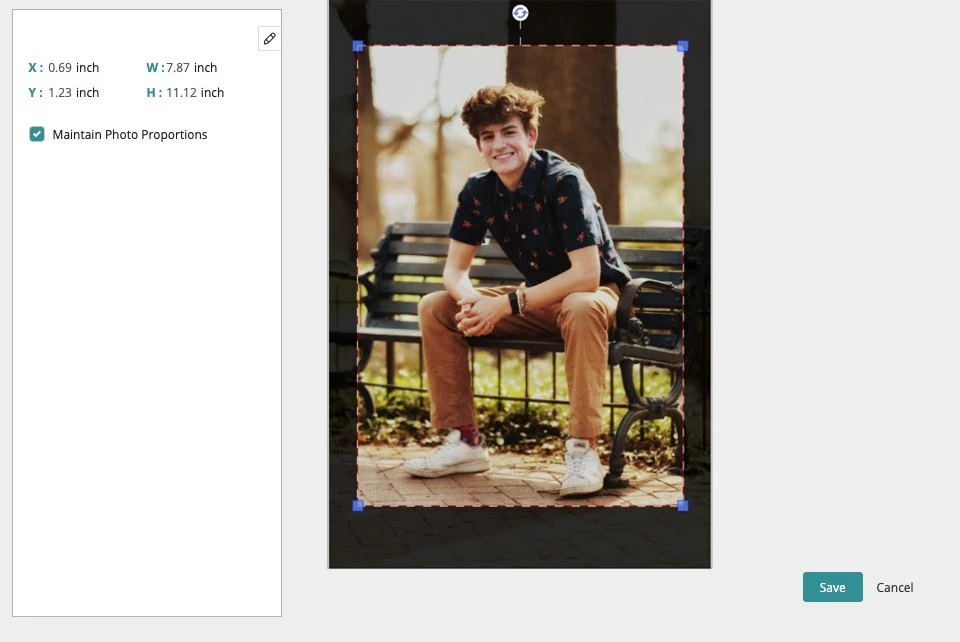
|
|
| |
|
| 8. | Adjust image brightness |
| | 
Click to select an image on your page to reveal the Image toolbar above your page. - Click :More to reveal additional tools below.
- Click Image Color & Brightness to open a new window.
Use the Brightness and Contrast sliders to lighten or darken photo. Note: It is often necessary to adjust Contrast when adjusting Brightness. | 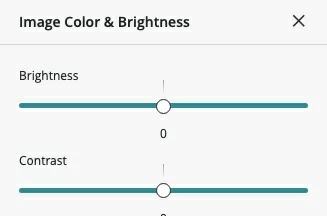 |
|
| |
|
| 9. | Add or change borders |
| |  |
| | Click to select an image on your page to reveal the Image toolbar above your page. - In the image toolbar, click Border & Mask.
- Border settings will show on left side of your page.
- Adjust the settings next to Border.
| 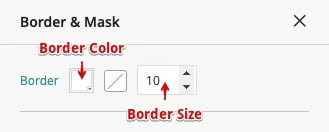 |
|
| | Click the Border Color square to select a different color for the border. Click square with diagonal red line to remove the color border Adjust the Border Size by changing the number in this box. You can type a number into this box, or use the arrows to increase or decrease the border size. |
| |
|
| 10. | Add graduate's name to poster design |
| | On your page, double-click on the Graduate Name text box to edit/change the name that appears on your design. Depending on the number of characters in your name, you may want to increase or decrease the font size so it fits nicely in the space. |
| |
|
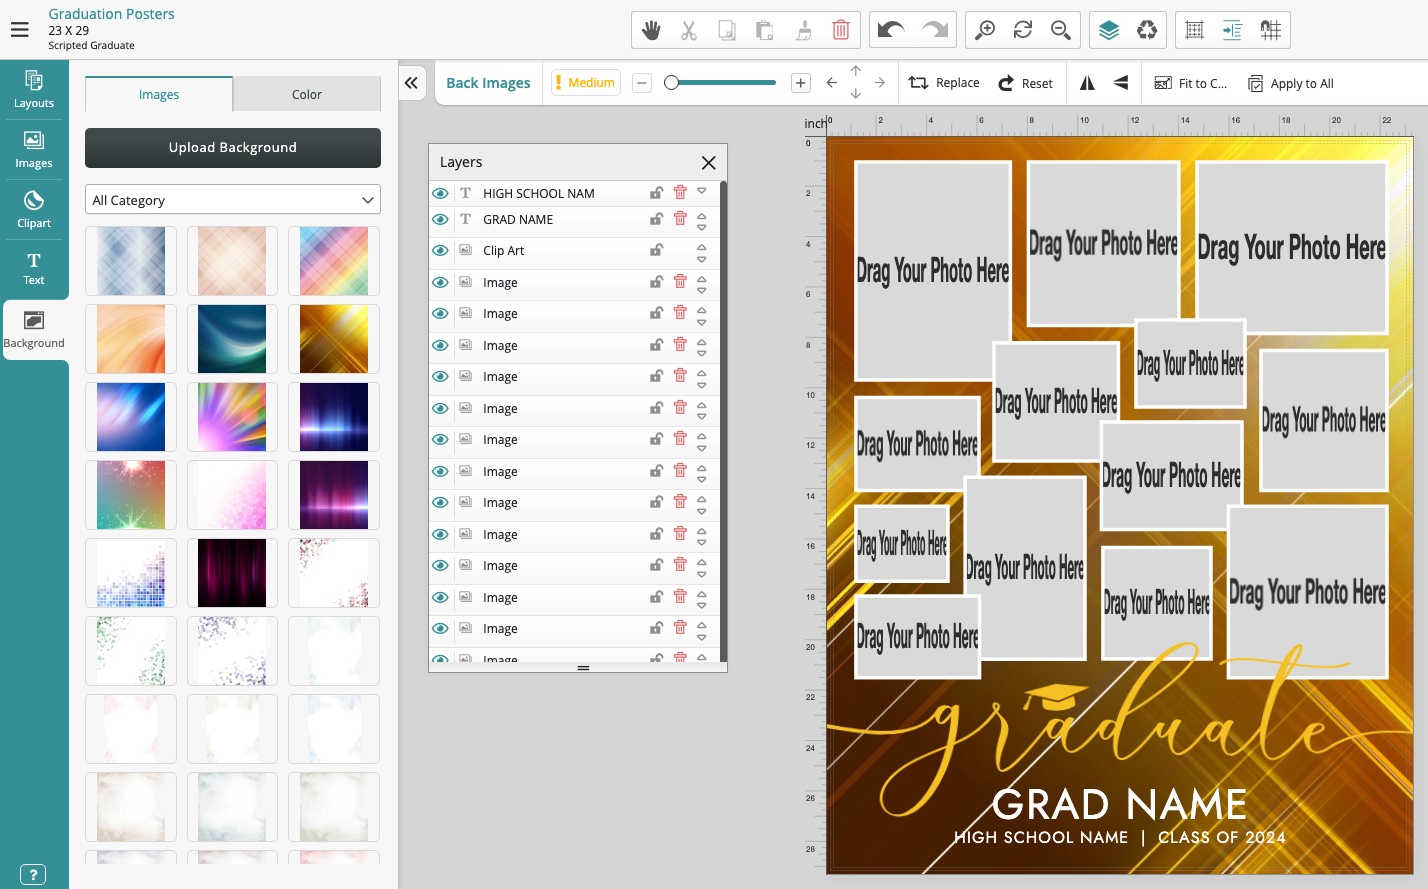
| 11. | Change background |
| | The background of your poster design can be changed to either a solid background color, or you can add an image background to your design.
To change the background to a solid color: - On the left side next to your page design, click the Background tab.
- Click the Color tab.
- Click the colored square next to Set Background to reveal color Swatches and the Color Selector where you can either click on a color swatch or mix a custom color.
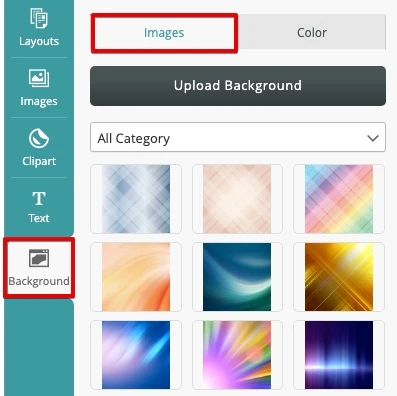
| 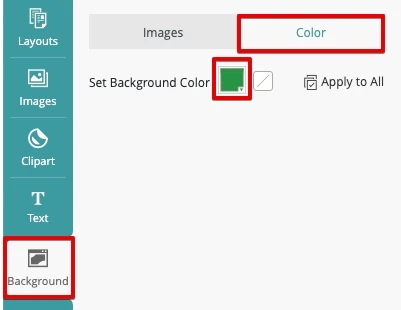 | To change the background to an image: - Click the Background tab (located on the left side, next to your page design).
- Click the Images tab.
- A list of images from the Cornerstone Image Gallery will populate in the tray. Click on any of the available background images to change the background of your page.
- To upload your own image to the background, click the Upload Background button.
|  |
|
| |
|
| 12. | Save your design |
| | 
Click the Save button located in the upper right corner to save your design to your projects. Now, your project can be found in your account under Account > Saved Projects. Click the Continue button to add your poster to your cart. |
| |
|
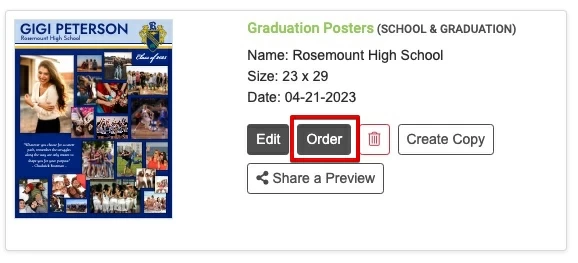
| 13. | Order |
| | When you are ready to order, go to Account > Saved Projects and click the Order button. |
| |  |
| | A product options page will appear to verify quantity and finishing options. A description of each option is described below. Click to Agree to Terms, and then click Save Options & Begin Checkout. |
| | |
| | | If you are creating a poster for a school event, you will want to be sure to order the Mount & Laminate option the event coordinators have requested. To learn what your school has requested, visit this page to download your school's Poster Information Guide, or contact your event coordinator for more information. |
|
| |
|
| 14. | Checkout and pay |
| | 1. Cart |
| | In the cart, double-check the options selected. To make a change to your options, click Edit Order. To continue with checkout, click the Continue button in lower left corner. |
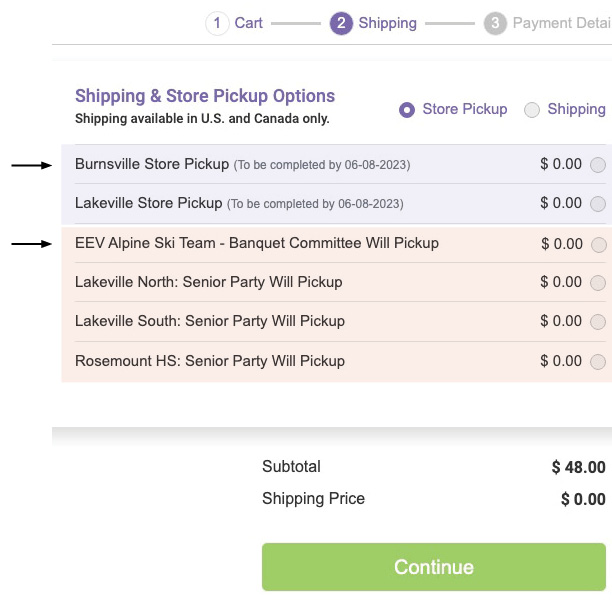
| | 2. Shipping (& Store Pickup) |
| | Under Shipping & Store Pickup Options, select Store Pickup to show available options. If you are ordering a poster for a special event, look for your school/organization in the pickup options. |
| | |
| | To pick up the poster yourself: Click to select the store location (Burnsville or Lakeville) where you would like to pick up your poster. Cornerstone will call you when your poster is ready for pickup. You will also be sent an email.
To have a school/organization pick up your poster: If your school/organization is collecting posters at a Cornerstone's location, an option will appear for a limited time for your School/Event. When selecting this option, you agree to have your school/organization pick up your poster from a select Cornerstone's location and deliver it to your event. There is no need to come into the store. NOTE: If this option is no longer available for your school, the deadline has passed. However, you can still select STORE PICKUP and deliver the poster to the event yourself (see Self Pickup above). |  |
After selecting an option, click the Continue button in lower left corner.
|
| | 3. Payment Details |
| Enter your credit card details to pay for your order. Then, click the Submit Order button.
You will receive a confirmation email at the email address in your account. If you do not see this email, check your spam or junk email folders. | By clicking the Submit Order button, you approve your order to be printed as soon as it has been submitted. If you discover an error in your design, contact us immediately at 952-891-8700 to see if we can help. We are available Monday - Friday, 8:00 am to 4:30 pm CST. (We are closed weekends and Memorial Day.) |
|
| |
|
| | Production Time |
| | Posters typically take 1-2 business days to complete. You will be notified when your poster has been completed. If you are not seeing any of Cornerstone's emails in your inbox, check your email junk or spam folders. |